Elementor Settings
This theme is powered by Elementor, allowing you to easily create pages with the page builder provided by this plugin.
For detailed explanations on using this page builder plugin, visit this page.
Feel free to use the Cimahi Elements to create the new page layout that you desire.
Or you can use the page template already included in this theme to save time or for reference.
Just ensure you've imported all demo content in Once Click Demo Import.
Recommended Settings
The settings in Elementor -> Editor -> Settings (tab)
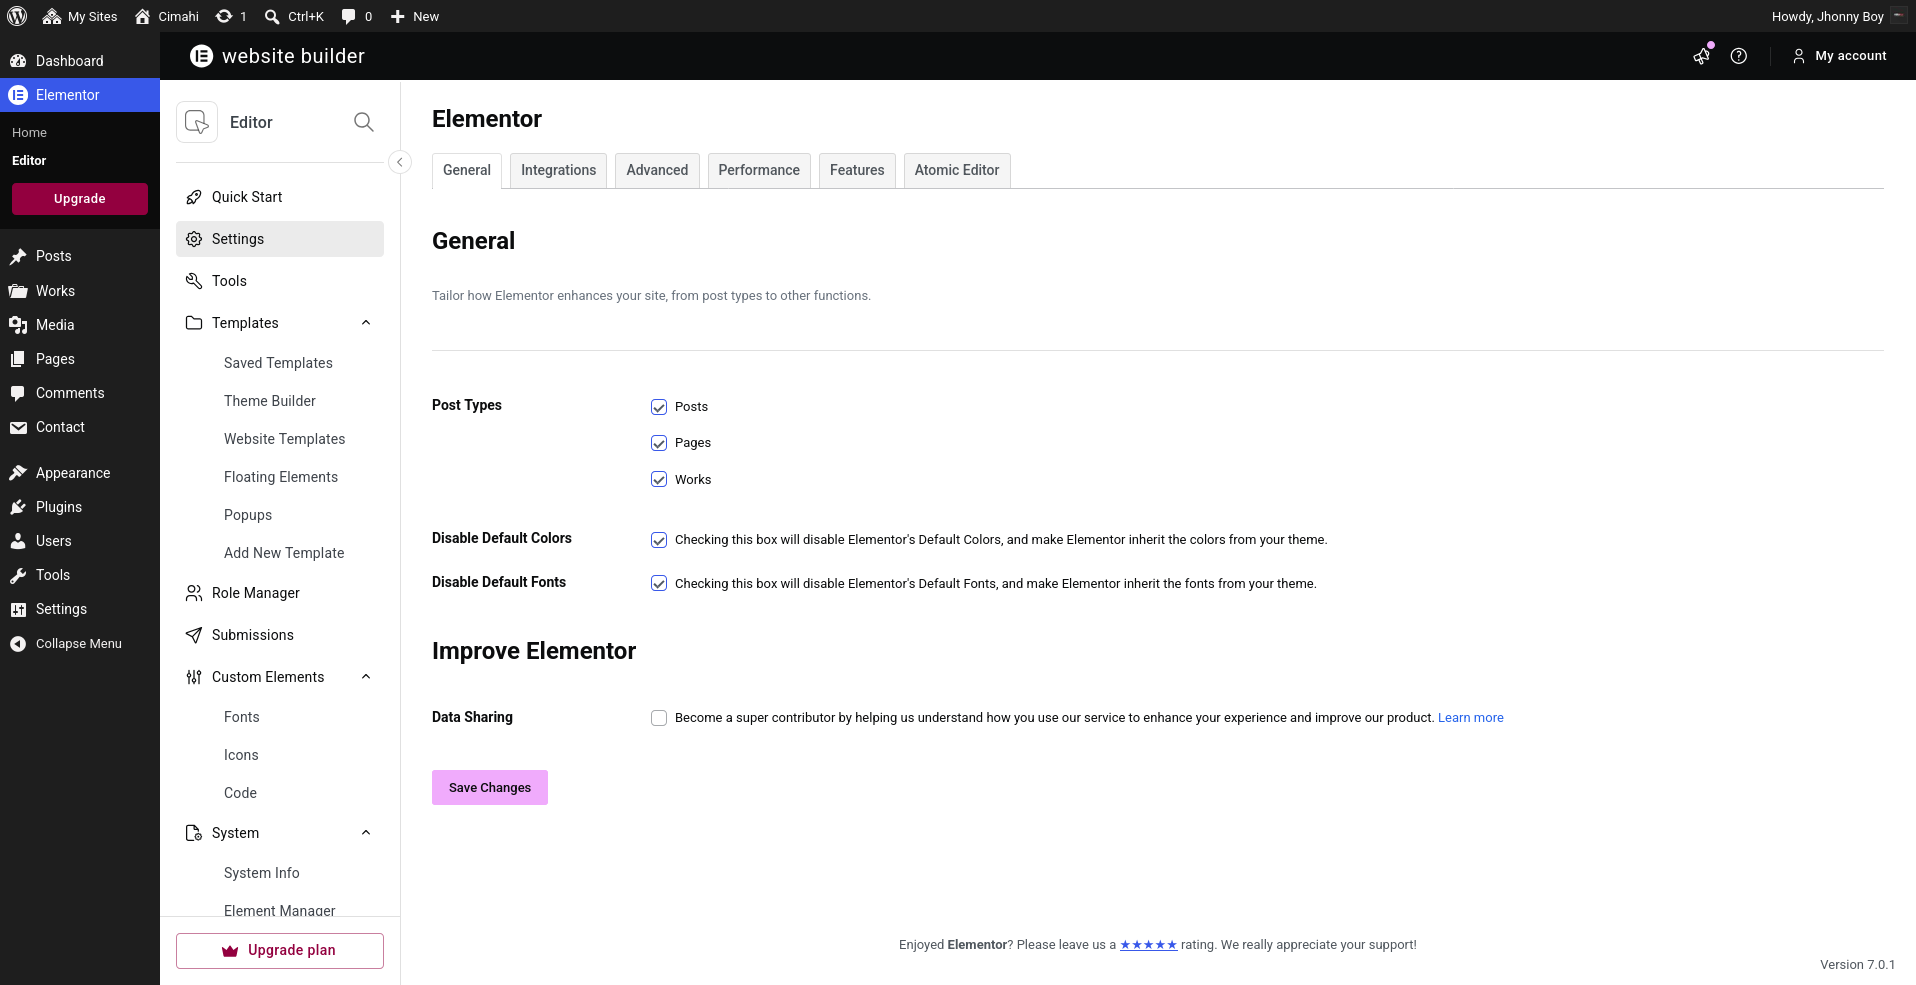
Make sure you checklist all the post types, so you can use page builder in those post type posts.
You need to checklist the Disable Default Colors and Disable Default Fonts too.
The settings in Elementor Editor -> Site Settings
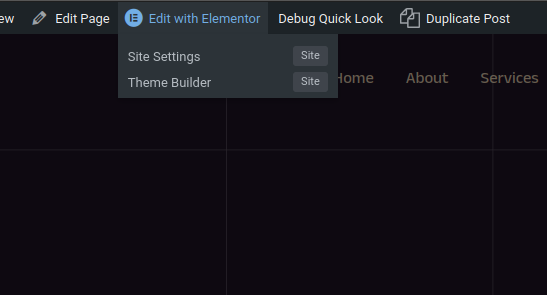
Go to page that created with elementor and choose Edit with Elementor -> Site Settings.
For Desktop Layout
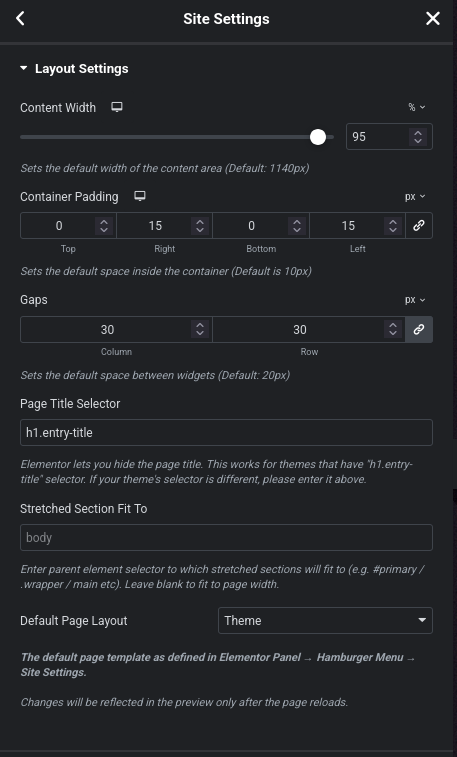
Go to Layout -> Content Width set to 95 (%)
Container Padding -> 0 15 0 15 (px)
Set the Gaps -> 30 (px) for Column and Row
For Tablet and Mobile (Portrait) Layout
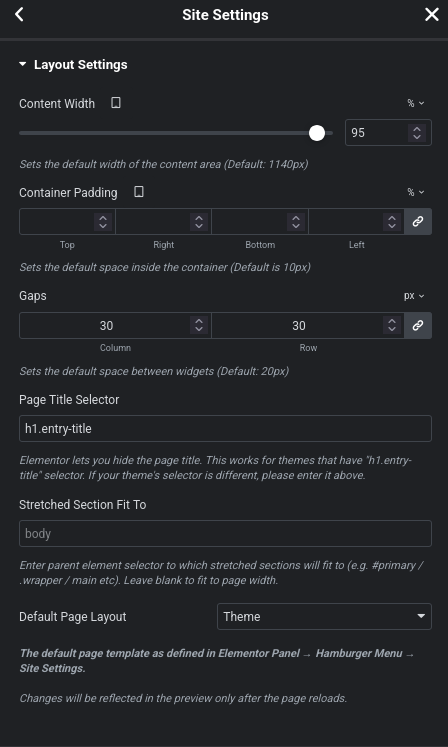
Go to Layout -> Click/choose the tablet icon in the Content Width -> Content Width set to 95 (%)
For Lightbox
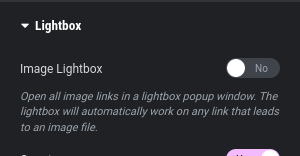
Go to Lightbox and select No for Image Lightbox.
Notes after importing the demo data:

It's important to navigate to Elementor -> Advanced tab and select Internal Embedding in the CSS Print Method first.
Then, save the changes and revisit CSS Print Method to choose External File, saving it again. This process ensures that the settings from the demo site are accurately replicated on your site.
Note: Some demo images/URLs may still be present in the demo content due to limitations with the WordPress and Elementor importer. We recommend replacing them with your own as soon as possible to prevent any errors.